You do not need to know how to code to build software anymore. That sentence would have sounded absurd five years ago, but AI has changed the rules. Today, with nothing more than clear ideas and the ability to describe what you want, you can create functional applications.
This guide will walk you through everything you need to know to build your first app using AI coding assistants. No prior programming experience required. We will cover choosing the right tools, writing effective prompts, avoiding common mistakes, and provide project ideas to get you started.
What You Need to Get Started
Before diving in, let us establish what you will need:
A computer with internet access: Any modern computer will work. Mac, Windows, or Linux all have access to the same AI tools.
An AI assistant account: Several options exist with free tiers that are sufficient for learning. Choose one that feels comfortable to use.
A clear idea of something you want to build: Start simple. A calculator, a to-do list, or a unit converter are perfect first projects.
Patience and willingness to iterate: Your first attempt will not be perfect. AI coding is a conversation, not a single command.
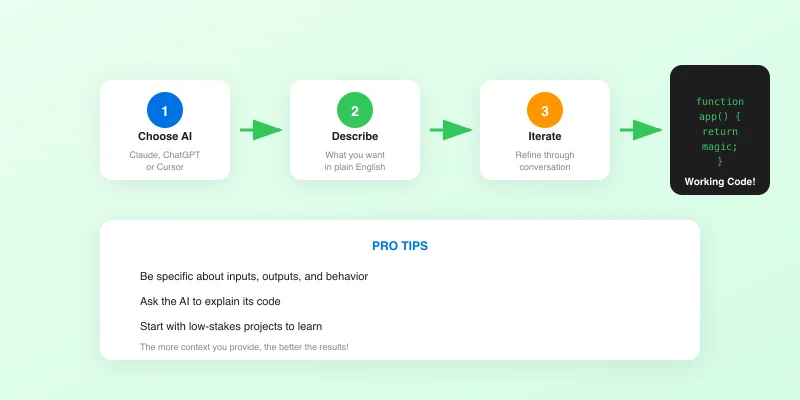
Choosing Your AI Coding Assistant
Several AI assistants can help you write code. Here is how to choose:
Web-Based Chat Assistants
Best for: Complex explanations, maintaining context over long conversations, and producing well-organized code. These excel at understanding nuanced requirements and asking clarifying questions when needed. Free tiers are generally generous for beginners.
Cursor IDE
Best for: Once you are comfortable with the basics, Cursor provides a complete coding environment with AI built in. It requires downloading software but offers a more integrated experience for editing and running code.
Replit
Best for: Running code immediately in your browser without any setup. Replit lets you see your creations working right away, which is motivating when learning. Its AI features continue improving.
For your first project, we recommend starting with a web-based AI chat interface. No downloads, no setup, just start typing.
The Art of Effective Prompting
The key skill in AI coding is not programming, it is communication. The better you can describe what you want, the better results you will get. Here are principles for effective prompting:
Be Specific About What You Want
Vague requests produce vague results. Compare these prompts:
Weak: "Make me a calculator."
Better: "Create a simple calculator web page that can add, subtract, multiply, and divide two numbers. It should have input fields for each number, buttons for each operation, and display the result clearly."
Even better: "Create a simple calculator web page with these features: two input fields for numbers, four buttons for add/subtract/multiply/divide, a clear display showing the result, and a clean modern design with rounded buttons and a light gray background."
Describe the User Experience
Think about how someone will use your app and describe that journey:
"When a user opens the page, they should see two empty number fields and four operation buttons. After entering numbers and clicking an operation, the result appears below. If they click another operation, it recalculates with the same numbers."
Mention Technical Preferences (Even If Basic)
Even without deep technical knowledge, you can specify:
- "Make this a single HTML file I can open in my browser"
- "Use modern, clean styling"
- "Keep it simple with no external dependencies"
- "Make it work on mobile phones too"
Ask for Explanations
Include phrases like "explain each section" or "add comments explaining what the code does." This helps you understand what you are getting and builds your knowledge for future projects.
Your First Project: Step by Step
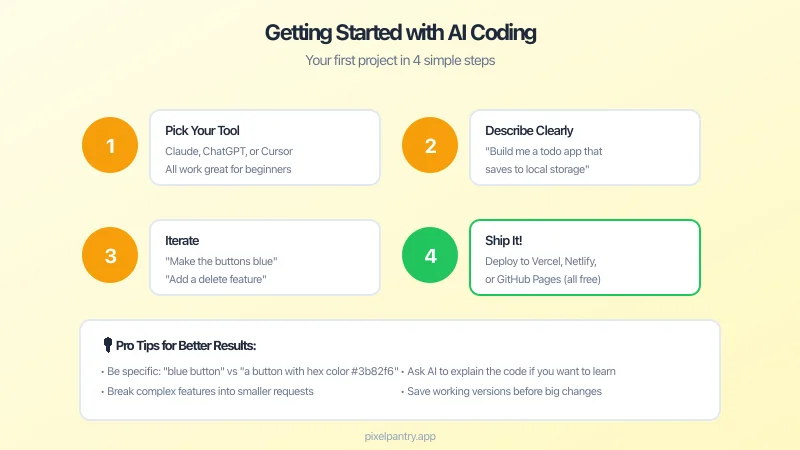
Let us walk through building a simple expense tracker as your first project:
Step 1: Define What You Want
Before opening an AI assistant, write down what you want in plain language:
"I want a simple expense tracker where I can enter what I spent money on and how much. It should keep a list of my expenses and show me the total. I want to be able to delete expenses if I make a mistake."
Step 2: Start the Conversation
Open your AI assistant and type your description. Be clear that you are a beginner:
"I am new to coding and want to create a simple expense tracker. Please create a single HTML file that I can open in my web browser. The tracker should let me: 1) Enter a description and amount for each expense, 2) See a list of all expenses I have added, 3) See the total of all expenses, 4) Delete individual expenses. Please use simple, modern styling and explain each part of the code with comments."
Step 3: Get and Test the Code
The AI will generate code. To test it:
- Copy all the code the AI provides
- Open a text editor (Notepad on Windows, TextEdit on Mac)
- Paste the code
- Save the file as "expense-tracker.html"
- Double-click the file to open it in your web browser
Step 4: Iterate and Improve
Your first version will likely need adjustments. Return to the AI and describe what is not working or what you want to change:
"The expense tracker works, but I would like a few changes: 1) The total should appear at the top instead of the bottom, 2) The delete button should be smaller and less prominent, 3) Can you add the ability to edit an expense after I have entered it?"
This back-and-forth conversation is how AI coding works. Each iteration gets you closer to what you want.
Common Mistakes Beginners Make
Learning from others' mistakes can save you time and frustration:
Trying to Build Too Much at Once
The most common mistake is trying to build a complex app as your first project. Start with something you can complete in an afternoon. Success builds confidence and skills that transfer to larger projects.
Not Testing Incrementally
Test each piece before adding more features. If you ask for an entire application at once and something does not work, it is hard to know what went wrong. Build up in stages.
Accepting Code Without Understanding
Always ask the AI to explain what the code does. You do not need to understand every detail, but you should understand the general structure. This helps you debug problems and make better requests.
Giving Up at the First Error
Errors are normal, even for experienced programmers. When something does not work, describe the problem to the AI: "When I click the add button, nothing happens. The browser shows this error message: [paste error]. What is wrong and how do I fix it?"
Not Saving Working Versions
When you get something working, save a copy before making changes. Name files like "expense-tracker-v1.html", "expense-tracker-v2.html" so you can return to a working version if something breaks.
Project Ideas for Beginners
Once you have built your first project, here are ideas for building your skills:
Beginner Level (First Week)
Tip Calculator: Enter a bill amount and tip percentage, see the tip and total.
Unit Converter: Convert between miles and kilometers, Fahrenheit and Celsius, or pounds and kilograms.
Random Quote Generator: Display a random inspirational quote from a list when a button is clicked.
Simple Timer: A countdown timer where you enter minutes and watch it count down.
Intermediate Level (Weeks 2-4)
Personal Dashboard: A homepage with weather, a to-do list, and quick links to your favorite sites.
Habit Tracker: Track daily habits with checkboxes and see your streaks over time.
Recipe Scaler: Enter a recipe and serving size, get adjusted ingredient amounts.
Simple Quiz Game: Multiple choice questions with score tracking.
Intermediate-Advanced (Month 2+)
Budget Planner: Track income and expenses by category with simple charts.
Client Contact Manager: Store and search client information for your business.
Invoice Generator: Create simple invoices you can print or save as PDF.
Appointment Scheduler: A simple booking system for your services.
At Pixel Pantry, many of our free tools started as projects just like these. The tools we release to help business owners began as experiments in AI-assisted development.
From Learning to Creating Real Solutions
As your skills grow, you will find yourself thinking about problems differently. Instead of wondering "is there an app for that?", you will start thinking "I could build that."
This shift is powerful. Business owners who can create their own tools are not limited to what software vendors decide to build. You can create solutions perfectly tailored to your specific needs.
The key is to keep practicing. Each project teaches you something new about how to communicate with AI, what is possible, and how to structure your requests. The learning curve is steep at first but flattens quickly.
When to Keep Building vs. Using Existing Tools
Not everything should be built from scratch. Use existing tools when they fit your needs well. Build custom solutions when:
- Existing options are too expensive for your budget
- You need something specific that no one else has built
- You want to learn and enjoy the process
- You want full control over your data and functionality
Next Steps on Your AI Coding Journey
Ready to go further? Here is what to explore next:
Learn basic HTML and CSS: Even a surface understanding helps you communicate better with AI and make small tweaks yourself.
Explore Cursor or Replit: Move beyond chat interfaces to dedicated coding environments with AI assistance built in.
Join communities: Online communities dedicated to AI coding share tips, projects, and encouragement. You will learn faster with others.
Build for others: Once you can build tools for yourself, try creating something useful for a friend or family member. Teaching and helping others accelerates learning.
The journey from complete beginner to someone who can build functional software is shorter than ever. With AI as your coding partner, the main requirement is curiosity and persistence. Start with something simple, build it today, and see where the journey takes you.


